I can't believe how quickly the summer seems to be flying by! Sorry its been so long since I've had a chance to post a new blog. I have been spending almost all my free time working in my garden and enjoying the amazingly HOT weather. Compared to last year, when I had to water the yard and the garden a few times a day, this summer has been just awesome in terms of rain. My tomato plants are literally 6' tall and I just added in a new trellis this morning to help support my Kirby cucumbers that are trying to climb over the garden shed!
It's been a summer like I remember when I was little....hot and sticky weather where you can just go run around the yard and then find a sprinkler to cool off when you get too hot. Drippy, sweet popsicles making way for bright blue and orange tongues on the kids running through the yards, and of course the smell of BBQ grills wafting through the evening breeze. Ah, summer!
 |
Line up your tools so everything
is within reach once you start the project. |
This year, it was the 4th of July cook out that gave us our first opportunity to taste another staple of summer - WATERMELON! I can't tell you how much my husband loves the stuff. I think he could eat an entire watermelon by himself in a sitting. I can't cut it up fast enough for him. But rather than just cutting it up and putting it into a bowl, I thought I would have a little fun and make something a bit more whimsical this year. A friend had sent me a cute picture from Pinterest of a watermelon Sea Turtle earlier this year, so I set out to create him. There weren't any directions with the picture, just some close ups and different angles so I was pretty much on my own to figure out how to assemble it.
 |
You want to cut a small slice off the
bottom to help it lay flat. |
Believe it or not, it really wasn't too difficult and since you get to eat all the tasty watermelon you aren't really wasting any of the fruit. He actually became kind of the mascot of the party and wherever we went, he came with us. I'm not sure at what point we decided to name him Maurice, but I credit my father-in-law for the name.
Start out with a large watermelon that looks like it would make a good Sea Turtle shell; I held up several at the grocery store until I'm sure people thought I was a little bit goofy. You want to pick one that feels heavier than it looks. That is how you know it will be ripe.
 |
You should have 3 pieces. A small slice off the
bottom and then the top piece that will become
the Sea Turtle shell. The largest portion becomes the
bowl you put the fruit in! |
You will want a nice large work area so you can keep everything close at hand as you build your turtle. I put down some plastic place mats that I had in the cabinet just as an extra precaution but it really wasn't too messy. Gather up your "tools", which in this case is a melon baller, a large knife and a zesting tool we use to make garnishes for drinks. You will also need a large bowl for the melon to go in once you have gotten to that point in the process.
 |
| Get that melon baller into action! |
The first step in the process is cutting a small slice off of the bottom of the watermelon to help it lay flat. You will use this piece to carve out the head, legs and tail so it needs to be large enough to give you watermelon rind to work with. You do need to cut into the watermelon itself - there will be some of the pink flesh showing. But don't worry, when you set it down on the platter or plate you are going to serve it on you won't see it.
 |
Place all the melon balls into a bowl as you work
your way through the fruit. I enlisted the help of my
mother-in-law, while I started carving. |
Next, you need to cut the piece off the top that will become the Sea Turtle Shell. You want this to be a larger slice and should be almost half of the remaining watermelon. You can just eyeball it - - there aren't any watermelon turtle carving judges that will come by and critique you so just have fun with it. Once you have your three pieces cut you can start using the melon baller to clean out the flesh of the watermelon.
Be careful when you are creating the "bowl" part with the main part of the fruit that you don't go down too far to the bottom. You want to leave enough thickness so you can fill it with fruit and have it keep its integrity. Remember, you sliced off the bottom so it would sit flat but you did cut into the flesh so just be cautious and leave a good solid bottom. You can completely clean out the piece that will become the turtle shell. It will make it easier to work with if it is lighter and cleaned out.
 |
Small squares - spaced out around the entire
outside rim of the watermelon - make for a
nice simple detail. |
Now, the fun part! Take the bottom (bowl) piece and working your way around the edge, you can carve out small little squares all the way around. The focal point will become the turtle itself but this does pretty up the bowl portion and since you are likely to take the star of the show off the top for serving this leaves you a pretty and decorated bowl.
 |
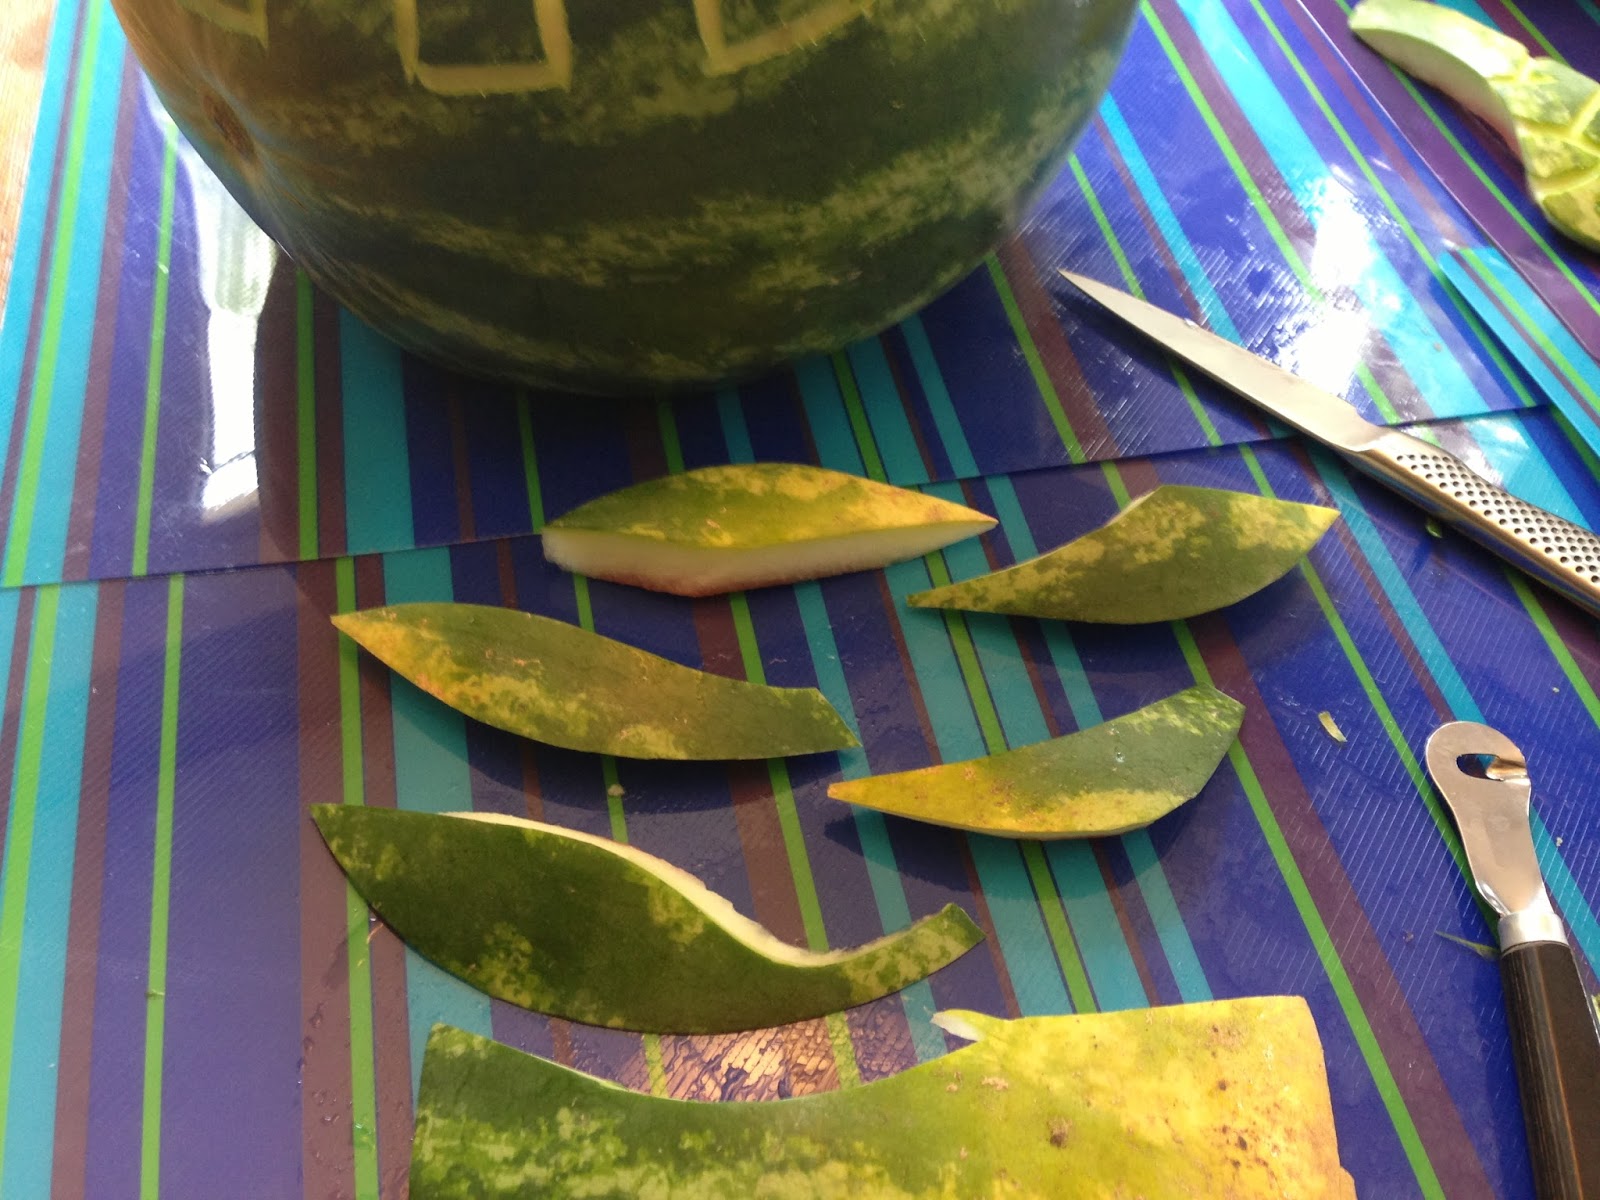
Carve out a small head --
with a neck to use for attaching
to the turtle shell |
The smallest piece that you cut off the bottom is what is going to become the head, legs and tail of the Sea Turtle. Pick a part of the rind that looks the nicest for the head and then just slice out smaller angled pieces for the rest of the legs - - and don't forget a tail!
 |
| Four legs and a tail! |
You can use a knife to clean off the underside of the pieces so they don't have any fruit on them and they are thin enough to attach to the shell. Don't worry too much about making the legs or tail "perfect". They really just need to similar in size and shape so they look uniform on the final product. Once you have the pieces cut out, you can get to work on carving out the pattern on the shell and the head. I just put a few small carvings on the head to make it look cute, and then bored out holes using a paring knife and stuck black peppercorns in for the eyes.
 |
A close up of the shell being
carved into hexagon shapes. |
On the shell, you are creating a repeating hexagon pattern so if you start in the middle and then work your way to the front and back, it ends up balancing out and looking really great without having to measure or be very precise. You can really do whatever pattern you think would be cute. I put a border around the shell that added some detail as well. The coloring on the watermelon really does all the work for you so I think its best to keep it simple.
 |
| Attach the legs and head with toothpicks. |
You can attach all the pieces using toothpicks or wooden skewers. It doesn't matter if they stick out or show a little because no one is going to be looking at the bottom anyway. I just used some kitchen shears to snip off the extra toothpick that was sticking out, so that the turtle could sit flat on top of the bowl of fruit. Once you have them all attached, you can fill the bowl with the rest of your fruit - I used grapes, pineapple and of course the watermelon.
 |
| Filled to the brim with tasty fruit salad! |
From start to finish it only took me about 35 minutes to create. I enlisted help with the melon baller so I could focus on the carving portion, but it really was fun and easy. And it was definitely the talk of the party. At some point, we lost track of Maurice, and found him lounging by the hot tub. It was just that kind of party! ;)

Happy Summer!
 |
| Finished Sea Turtle Maurice in all his 4th of July glory! |


No comments:
Post a Comment